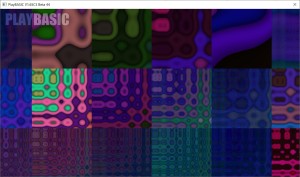
* A palette of colours is generated using sine waves for smooth colour bands.
* A series of procedural “plasma” images are created — but instead of storing colours, they only store palette indices.
* Each image is turned into a sprite, and each sprite is mapped to a different offset in the palette.
In the main loop:
* The palette is scrolled every frame, so the colours inside the sprites flow smoothly.
* The sprites themselves scroll across the screen from right to left, wrapping back around when they exit.
* Random tints and blend modes make the visuals more dynamic.
* A plasma-tile background and a tinted PlayBASIC logo sprite are drawn along with the animated sprites.
The result is a classic demoscene-style plasma effect where colours constantly shift and flow, but the sprites themselves never change shape — all the animation comes from palette cycling and sprite movement.
#1
Sprite Plasma Effect.zip (22.31 KB)
Sprite Palette Mapping Example
By: Kevin Picone | Added: October 2nd, 2025
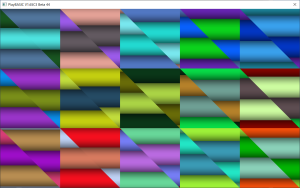
This demo shows how **palette mapping** works in PlayBASIC with sprites.
Instead of giving each pixel its own colour, the sprite image only stores **palette indexes**. A separate palette array holds the actual colours. By changing which part of the palette the sprite looks at, the colours of the sprite can be animated in real time — without redrawing the sprite itself.
Here’s what happens step by step:
1. A colour palette is created using sine waves, making smooth bands of colours.
2. An image is built that uses this palette.
3. Multiple sprites are created from that image and displayed on the screen.
4. Each frame, the program shifts the part of the palette each sprite uses.
5. This makes the sprites look like they are filled with flowing, animated colours, even though the sprite image never changes.
This technique was widely used in classic 2D games and demos to create **cheap, smooth animations** without needing lots of CPU or memory.
#1
SpritePalettePtr - Example.zip (3.18 KB)
Bubble Sort Numbers Example
By: Kevin Picone | Added: October 2nd, 2025
Description (for beginners):
This program demonstrates how to sort numbers in PlayBASIC.
* First, it fills an array with random numbers.
* It prints the numbers before sorting so we can see them mixed up.
* Then, it uses a simple method called insertion sorting to put the numbers in order.
* Each time a new number is added, the program checks if it should move backwards to fit in the correct place.
Finally, it prints the numbers again, showing them sorted from smallest to largest.
PlayBASIC Code:
; ---------------------------------------------------; Example: Insertion Sort with Before / After Output; ---------------------------------------------------; Create an array to hold 10 numbersDim Numbers(10); Fill the array with random numbers between 0 and 100For lp =1To10
Numbers(lp)=Rnd(100)Next; -----------------------------------------------; Show the list BEFORE sorting; -----------------------------------------------Print"Numbers BEFORE sorting:"For lp =1To10Print Numbers(lp)NextPrint"---------------------------------"; -----------------------------------------------; Sort the numbers using Insertion Sort; -----------------------------------------------For lp =1To10; Bubble the current number backwards if neededFor SearchLP = lp To2Step-1; Compare with the number before itIf Numbers(SearchLP)< Numbers(SearchLP -1); Swap the numbers if out of order
A = Numbers(SearchLP)
B = Numbers(SearchLP -1)
Numbers(SearchLP)= B
Numbers(SearchLP -1)= A
EndIfNextNext; -----------------------------------------------; Show the list AFTER sorting; -----------------------------------------------Print"Numbers AFTER sorting:"For lp =1To10Print Numbers(lp)Next; Wait for a key before closingSyncWaitKey
Scrolling Console Example (PlayBASIC)
By: Kevin Picone | Added: September 30th, 2025
This program shows how you can build your own scrolling text console in PlayBASIC. A console is just an area on the screen where lines of text are displayed one after another, similar to the output window in many programming tools. Since PlayBASIC doesn’t come with a built-in scrolling console, this example demonstrates how to create one from scratch.
Here’s what the code does step by step:
Setup
-- It loads a simple font (courier new) so all the text lines line up neatly.
-- It prepares a buffer (storage area) that will hold the lines of text to display.
-- Loading Text
-- The program reads a text file (main.pba) and stores each line into the console buffer.
-- It also prints some header lines (like separators and the filename) to make the output look tidy.
Displaying the Console
The RenderConsole function draws the console lines on the screen.
-- Only the lines that currently fit on the screen are shown.
-- Older lines scroll out of view at the top, while newer lines appear at the bottom.
-- Scrolling with the Mouse
-- You can use the mouse scroll wheel to move up and down through the console output.
-- A fading message (“Use Scroll Wheel”) appears at the bottom corner to remind you of the control.
-- Storing Output in Buffers
-- Behind the scenes, the console text is stored in chunks (or “pages”) called buffers.
-- Each buffer can only hold a set number of lines (64 in this case). When it fills up, a new buffer is created.
-- This keeps things organized and prevents the console from running out of space.
This version of the scrolling map demo animates the level tiles manually using a table. The table converts the tile to the next tile. Since the map blocks graphics are single colour wave, we can get lots of nice /weird looking effects by animating the tiles.
PlayBASIC Code:
setfps60; Smooth Scroll Register
ScrollX =0; Block Size
BlockSize =8; Create a map with some randomly shaded tiles
ThisMap = CreateDemoMap(BlockSize,BlockSize)
Width =(GetScreenWidth()/ BlockSize)+2
Height =(GetScreenHeight()/(BlockSize))+2
ScrollingLevel =NewLevel(ThisMap,Width,Height); prefill the existing maps tile for xlp =0toGetLevelWidth(ThisMap,ScrollingLevel)
SeedScroll(ThisMap,ScrollingLevel,xlp)nextDim Remap(255)For lp=0to255
remap(lp)=(lp+3)and255next; -----------------------------------------------; Start of Do/Loop; -----------------------------------------------Do; Clear the screen; Cls RGB(30,50,20); inkmode 1+8; Draw Level #2 of MyMap to 100x,100yDrawMap ThisMap,ScrollingLevel,0-ScrollX,0
ScrollX++if ScrollX>=GetMapBlockWidth(ThisMap); Shift all the tiles in this level to the left by; 1 tile
ScrollLevel ThisMap,ScrollingLevel,-1,0; Render some tiles down the right hand edge of the ; the map. So it appears to be scrolling
x =GetLevelWidth(THisMap,ScrollingLevel)
SeedScroll(ThisMap,ScrollingLevel,X)
ScrollX=0endiffor ylp=0toGetLevelHeight(ThisMap,ThisLevel)for xlp=0toGetLevelWidth(ThisMap,ThisLevel)
Tile=peekleveltile( ThisMap,ThisLevel,Xlp,Ylp)
Tile=Remap(Tile and255)pokeleveltile ThisMap,ThisLevel,Xlp,Ylp,Tile
nextnext; Display a Messagetext10,10, "Classic 8/16bit Smooth Scrolling Example"; Display the screen and loop back to the DOSyncLoopspacekey()Function SeedScroll(ThisMap,ThisLEvel,Xpos)Static OffsetAngle#
OffsetAngle# =wrapangle(OffsetAngle#+10)
Blocks =GetMapBlocks(ThisMap)for ylp =0toGetLevelheight(ThisMap,ThisLevel)
Block =ylp+(sin(OffsetAngle#)*(Blocks*0.5))pokeleveltile ThisMap,ThisLevel,Xpos,ylp,abs(mod(block,Blocks))nextEndFunctionFunction CreateDemoMap(BlockWidth,BlockHeight); Create a map with provision for 5 levels
ThisMap=NewMap(5)
Blocks =256; Create some empty graphics blocks for MyMAPCreateMapGFX ThisMap,BlockWidth,BlockHeight,Blocks,RGB(0,0,0)
ThisRGB2 =$334455
ThisRGB2=$ffee70
AngleScale#=360.0/ Blocks
; Create randomly colours block for MyMapFor lp=0To Blocks-1
scale# =0.5+(cos(lp*AngleScale#)*0.45)
ThisRGB =RgbAlphaBlend( ThisRGB1,ThisRGB2, Scale#*100); draw a randomly coloured boxBoxC0,0,BlockWidth-1,BlockHeight-1,1,ThisRGB
; Copy the box image into MyMap blockGetMapBlk ThisMap, lp, 0,0NextPrepareFxMap ThisMap
EndFunction ThisMap
Function ScrollLevel(ThisMap,ThisLevel,DirectionX,DirectionY)ifGetMapStatus(ThisMap)=falsethenexitfunctionifGetLevelStatus(ThisMap,ThisLevel)=falsethenexitfunctionlocal w=GetLevelWidth(ThisMap,ThisLevel)local h=GetLevelHeight(ThisMap,ThisLevel)local TempLevel =GetFreeMapLevel(ThisMap)CloneLEvel ThisMap ,ThisLevel ,ThisMap ,TempLevel
CopyLevel ThisMap,TempLevel,0,0,w,h,ThisMap,ThisLEvel,DirectionX,DirectionY
deletelevel ThisMap,TempLevel
ENdFunction